
For my first proper post on this blog, I thought it would be appropriate to put up something I'm learning for the first time.
Magnets have always been a topic I have shied away from as a wargamer; they're strange, terrifying creatures that operate using some mystical form of science magic my simple archaeologist brain cannot begin to fathom.
They make the model bits stick together, that's all I know. Apparently people use them so they don't have to buy two Space Marine models to swap Special Weapons around, but that may be just a rumour...
Why start magnetising then if I'm clearly as dumb as post when it comes to simple things like magnetic fields and reactive forces?
I was putting together my Bolt Action weapons teams, and realised that at some point during my games I was going to lose models from the unit (don't tell the men I said that). I always dislike the idea of using wound tokens or markers for models that only have multiple wounds or HP by virtue of having multiple blokes on the same base (Imperial Guard weapons teams being by go-to Warhammer 40k example), and so was attempting to devise some system by which I could pin the models onto the plastic base and detach individual members of the team as they took casualties. I realised I wasn't getting anywhere with it due to how shallow the bases were though, and so steeled myself for the only course left open; I therefore plunged into the depths of the internet determined to conquer my fear of the eponymous magnets.
With barely any clue as to what I was looking for or where I should begin my search, I ordered a simple set of 2mm x 1mm Neodymium disc magnets from Magnet Expert ltd. (via the mistress of speedy delivery, Amazon.co.uk). The magnets were ordered yesterday and arrived this morning, so already Magnet Expert ltd. have made it into my good books. I'll be honest, I chose them because they were the first I found in what I felt was the appropriate size.
 |
| World's most complex label |
 |
| Handy! |
Inside the box:
Upon opening the package, I found the magnets encased in both a handy plastic container and a ziplock bag.
 |
| Corporal, you've been volunteered as "Tester" |
 |
| You can (faintly) see the pencil guidelines |
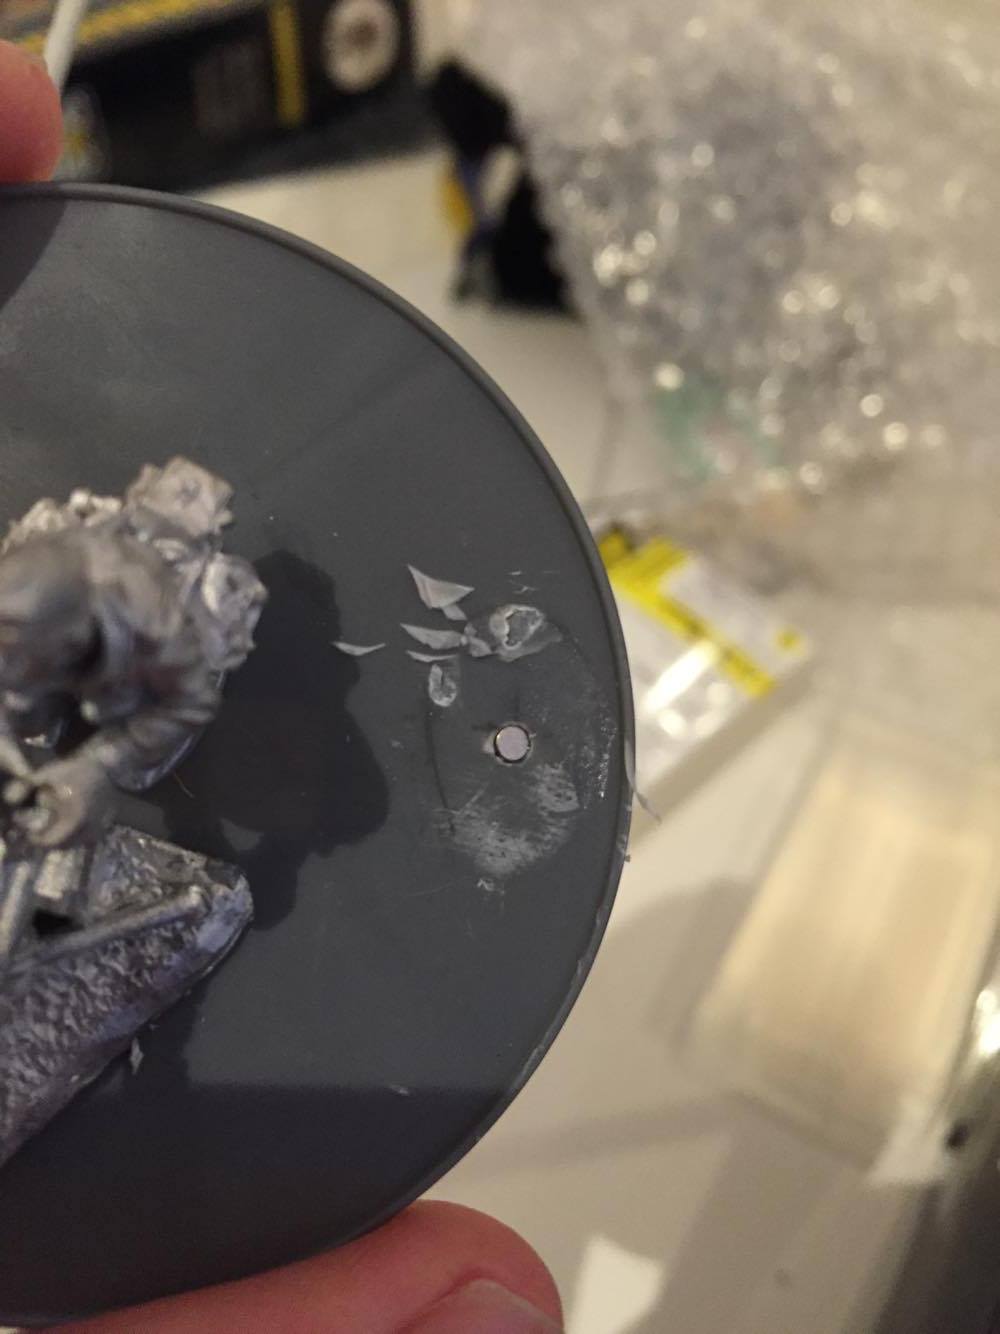
STEP ONE:
I set to work eagerly, drilling a hole using a 2mm drill bit and hand drill from Games Workshop to make a pre-marked hole in the base of the models that were to be magnetised, having marked a corresponding point on the base for the receiving magnet to go.
STEP TWO:
I then completed work on each member of the team who needed to be magnetised. NB: the metal models actually required TWO magnets to hold them in place, and even then they still wobbled. The plastics offered no resistance to a single magnet; logically this is due to the vastly heavier metal models putting a lot of strain on the small magnets.
STEP THREE - THE FINISHED PRODUCT:
As you can see, the finished product looks perfectly fine from a tabletop perspective. The metal models are still a little wobbly in one or two cases, the ammo jockey for the MMG in particular proving a pain - though the two crewmen on the Mortar will stay locked in place even when the base is turned upside-down. The plastics can also be held upside-down and don't even tremble slightly. Weight is apparently a huge factor (who'd have thought, in a topic concerning opposite forces and gravity?).
 |
| The finished assembly, just need to spruce the bases up |
 |
| Demonstrating the models are easily removable for storage |
Surprisingly easy to get the hang of, magnetising these gents took a little while as I kept forgetting the basic principle that one MUST check the magnet ends they have chosen align correctly, otherwise you'll find the model ends up being repelled dramatically from the base when you take your hands off due to opposite forces.
That, however, is something I doubt anyone but myself would be dumb enough to forget and then consistently continue to forget throughout the whole process.
Nice progress with the blog and a great article. Keep it up rivet counter! ::D
ReplyDeleteThank you kindly, sir!
DeleteSorry for the late reply; still trying to figure out how notifications work on this thing! :)